Design
The assignment was to learn the laser cutter by making something with it. I picked a laptop stand because I needed one for my own desk and because a stand is small enough to iterate on inside one studio session if the first cut went wrong.
The first version of the design was a four-part easel. Two side panels held the geometry, a back brace dropped into notches to keep them parallel, and a front lip caught the bottom edge of the laptop. I sized everything by measuring my 2023 MacBook Pro directly, so the stand would fit the device I was building it for, and I drew it in Boxy SVG with a small offset on every slot to account for kerf. The plan worked on paper, but as I sat with it the next morning I realized four parts and three joints was more than the object actually needed. The same stand could be a single joint between two pieces if I let the geometry do more of the work.
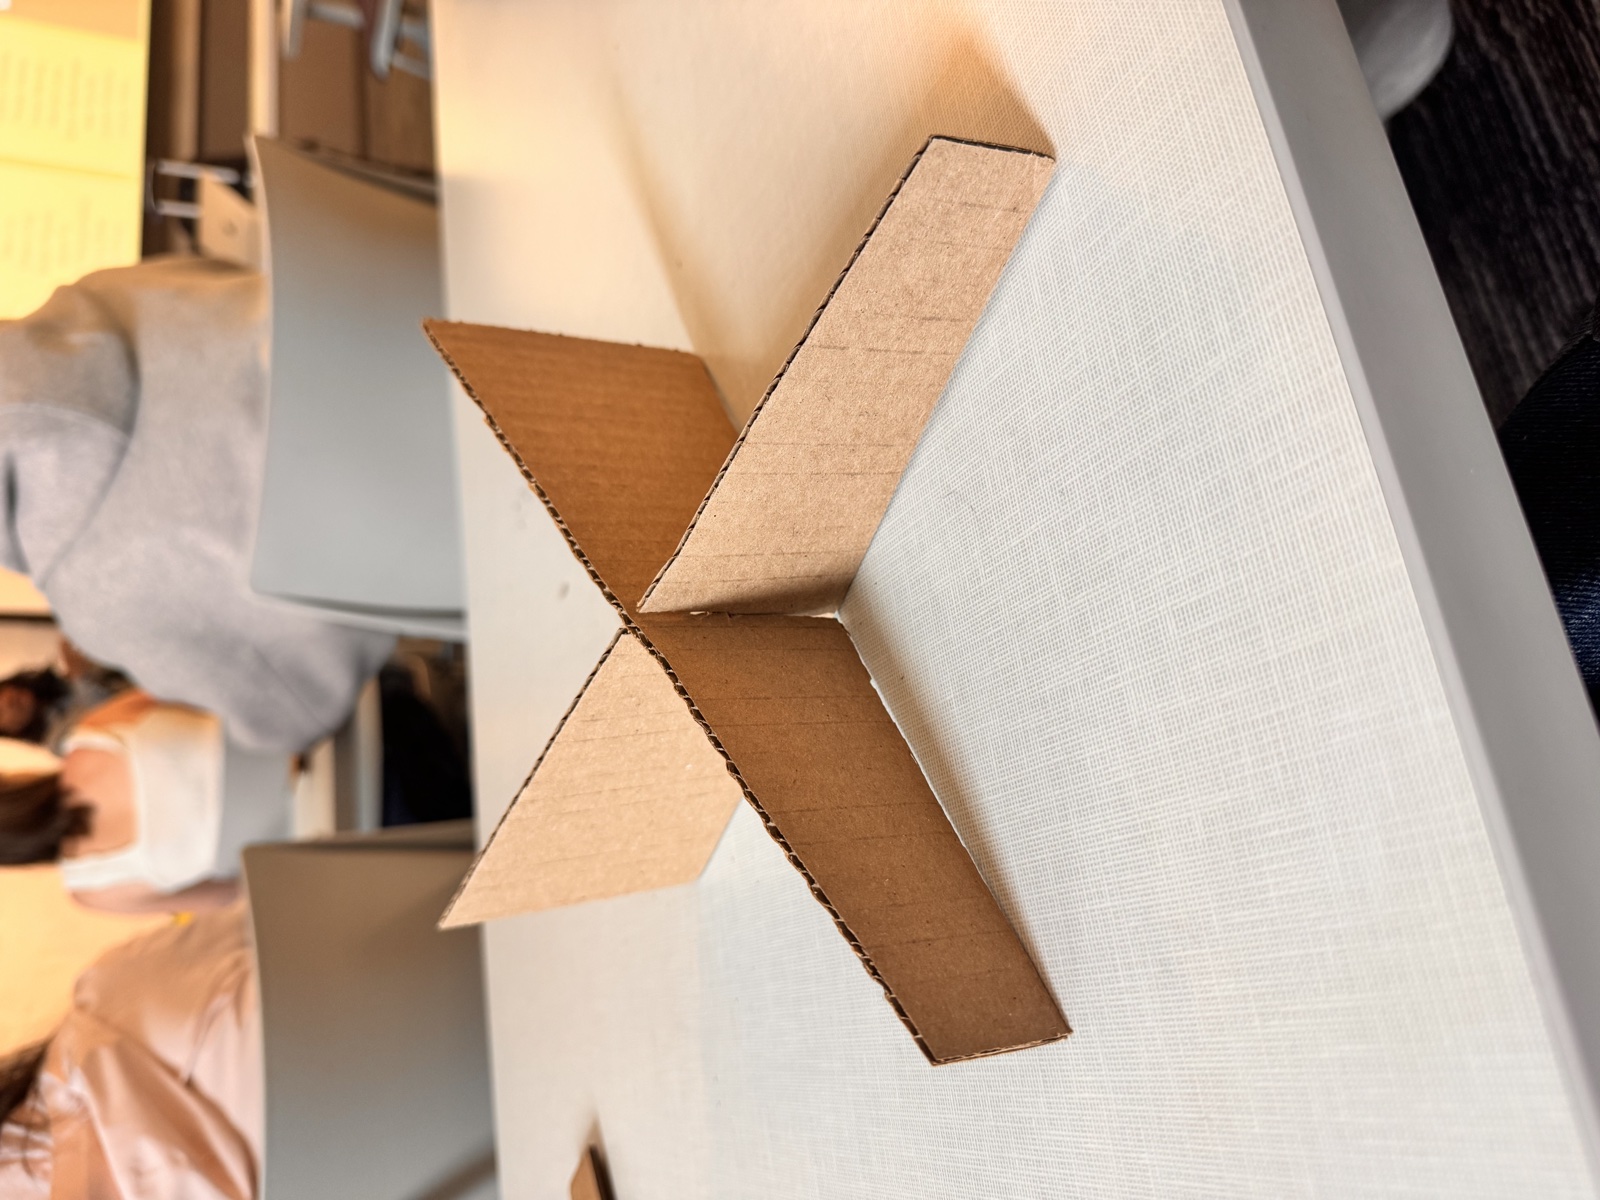
I redesigned the stand around a single move. Two identical wedge-shaped panels, mirrored, with a slot cut into the center of each that lets them interlock at ninety degrees and stand on their own. The X-shape that results is the entire structure. There is no brace, no lip, no glue, and the laptop’s own weight presses the joint together as it sits on the top edge. The whole thing is two parts, cut from one sheet, and it goes from flat pack to assembled in about ten seconds. Once I had the geometry I added the surface treatments that the laser is good for, a sliced and bitten wax apple I drew myself engraved into one face, a second smaller version of the same symbol cut all the way through so the surface behind it shows when assembled, and my signature in script along the inside of one panel. The wax apple is a joke that only works because nobody is supposed to bite a wax apple, and putting it on a laptop stand made me laugh enough that I kept it.
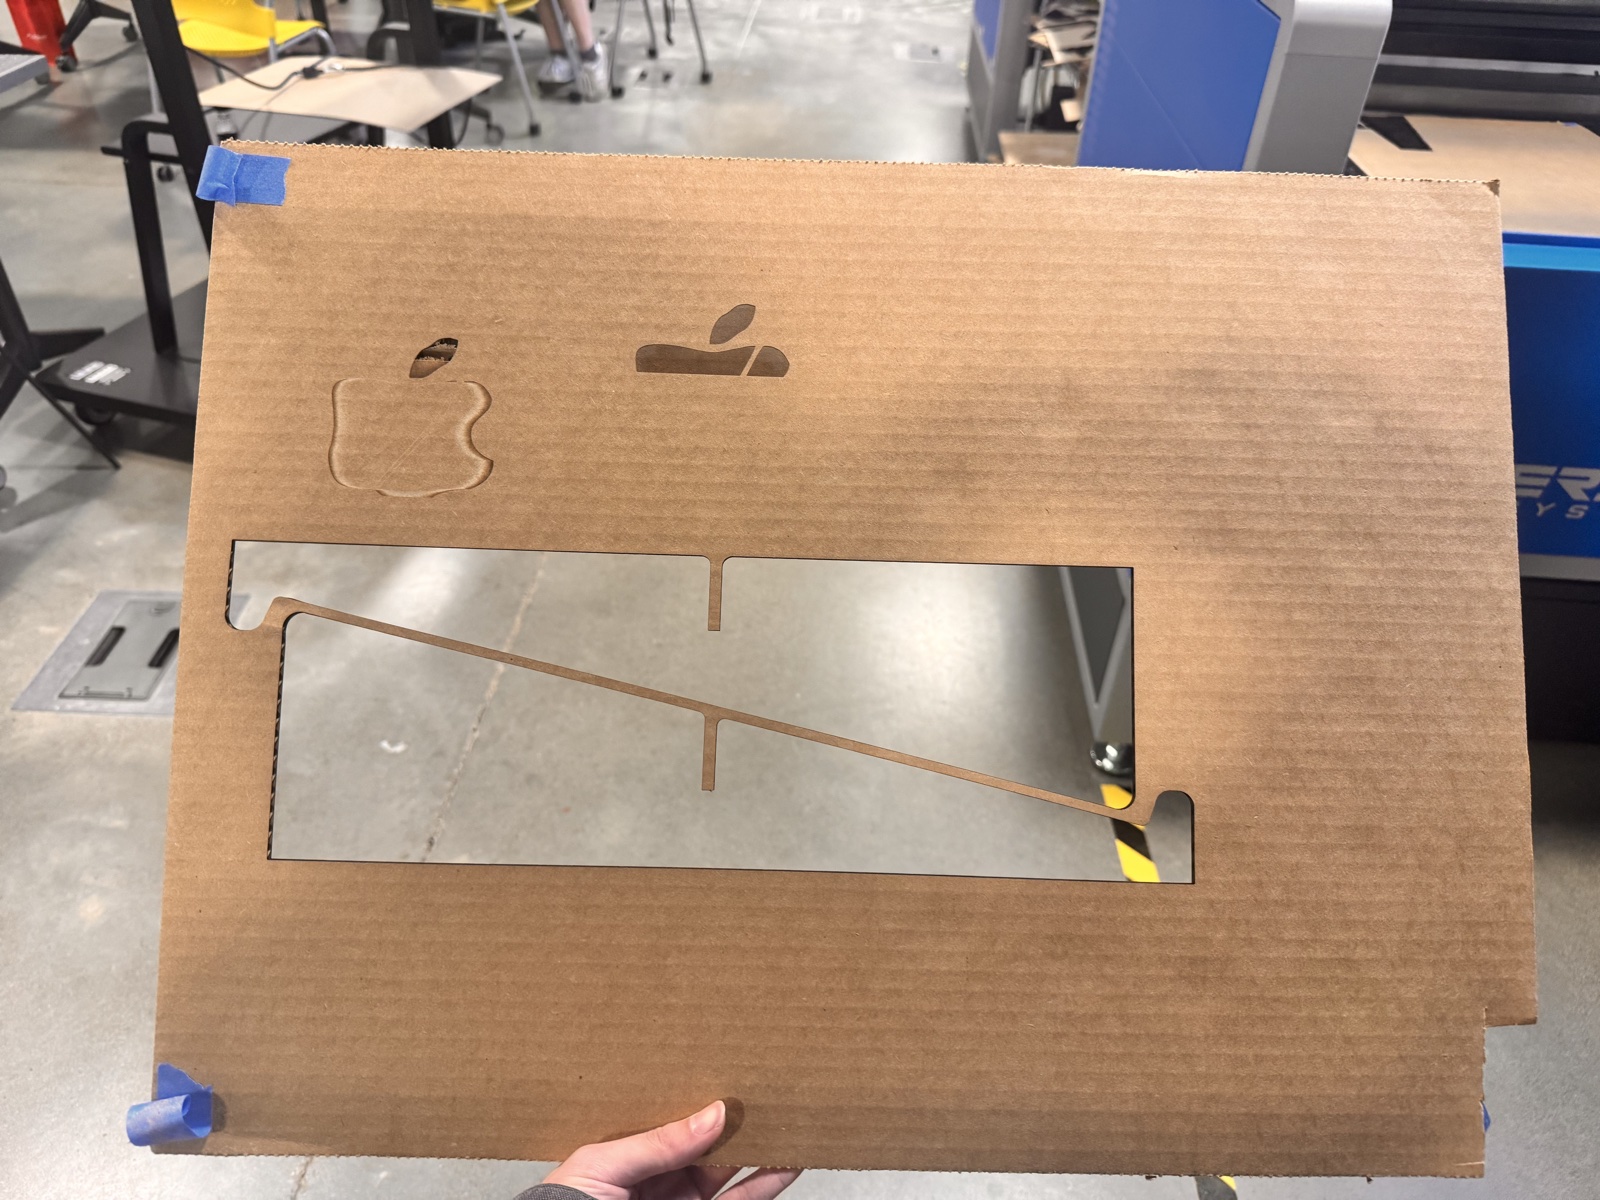
The two cut files below are the actual artifacts I sent to the machine, the abandoned easel template first, then the final two-piece template that got cut.


Sketches
There were eight or ten hand-drawn sketches before any of this got serious, most of them disposable variations on a theme that did not survive the next morning’s read-through. The two below are the ones the design actually moves through, the easel concept I abandoned and the X-shape I committed to. They are very rough and only an estimate of the originals, redrawn from memory rather than scanned, so the proportions and the annotations should be read as the gist of what I had on paper rather than the literal page.


The second sketch is the one I actually built from. The first was useful only to recognize that I was solving the wrong problem.
Prototype
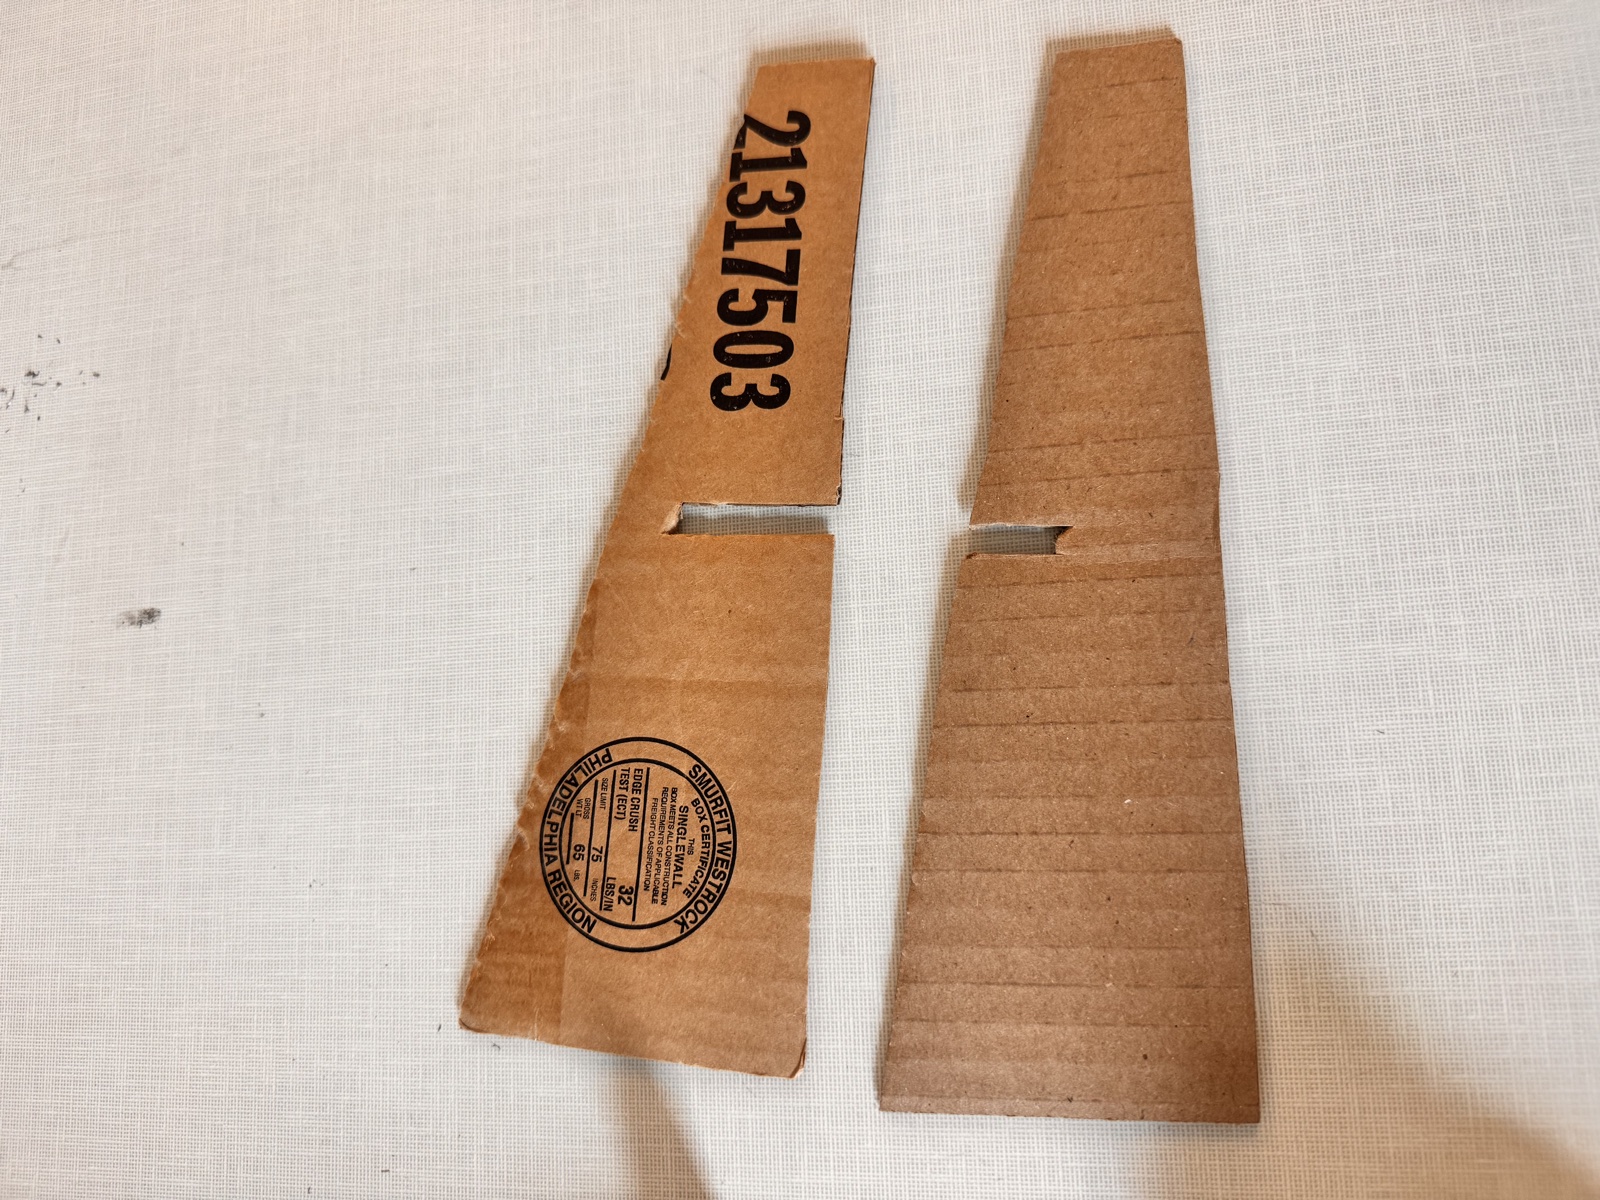
I built the X-shape first in regular Amazon shipping cardboard, with a box cutter and a steel ruler, because I wanted to confirm the geometry before I trusted it to a laser bed I had a limited number of slots on. The cardboard prototype was rough, the slots were oversized because I had cut them by eye, and the panels did not stand quite plumb, but it held a closed laptop and the joint did what I had drawn. That was enough to commit.
The laser version was cut from flute board on the studio’s laser cutter. Instead of running a calibration grid I walked the settings up by feel. For the engraving I started at 8 percent power and tested up through 35, which produced a clearly charred halo, and I landed at 25 percent for the actual face engraving. For the cuts I started at 35 and ended at 45, which is what got the slot and the cut-through wax apple all the way through the board on a single pass.
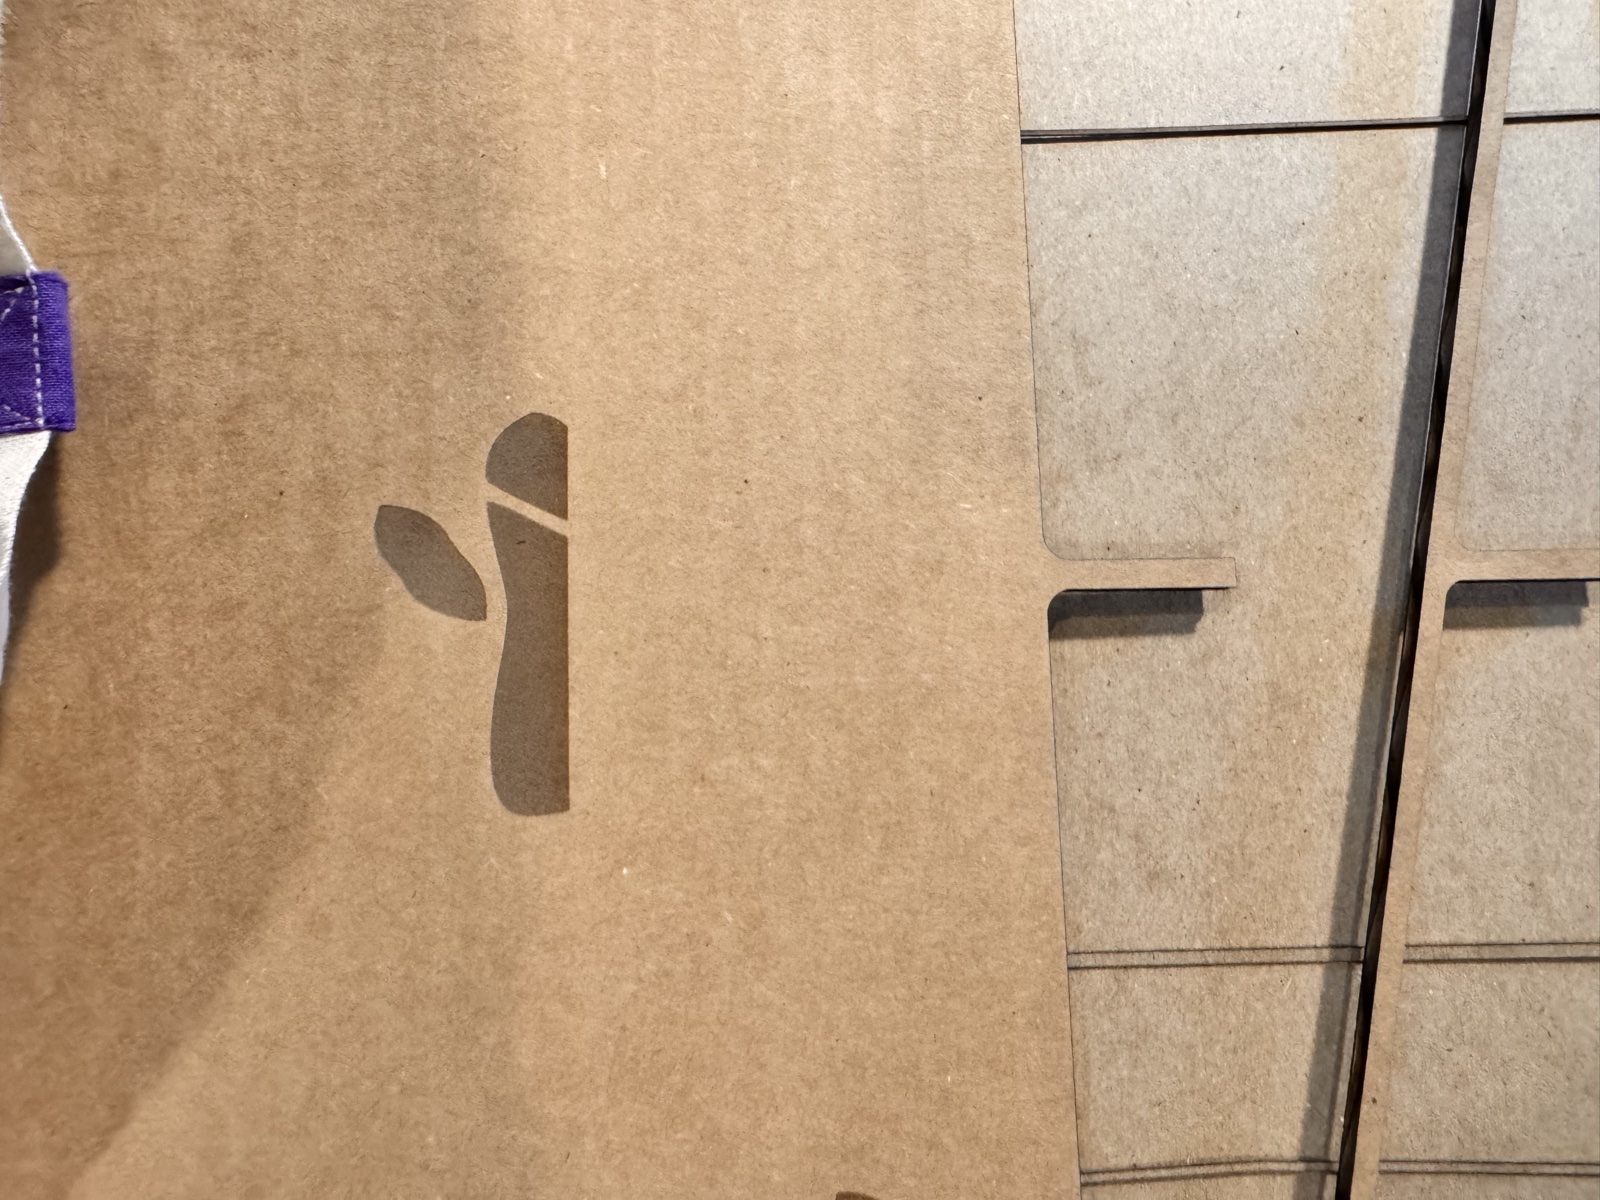
The first run failed partway through. The cutter stopped mid-pass and when I lifted the lid the cuts had completed cleanly along the side panels but the small wax apple silhouette near the top of one piece had only been scored, not cut through. I cleared the bed, taped the board back into registration, and ran only the unfinished path on the second pass.
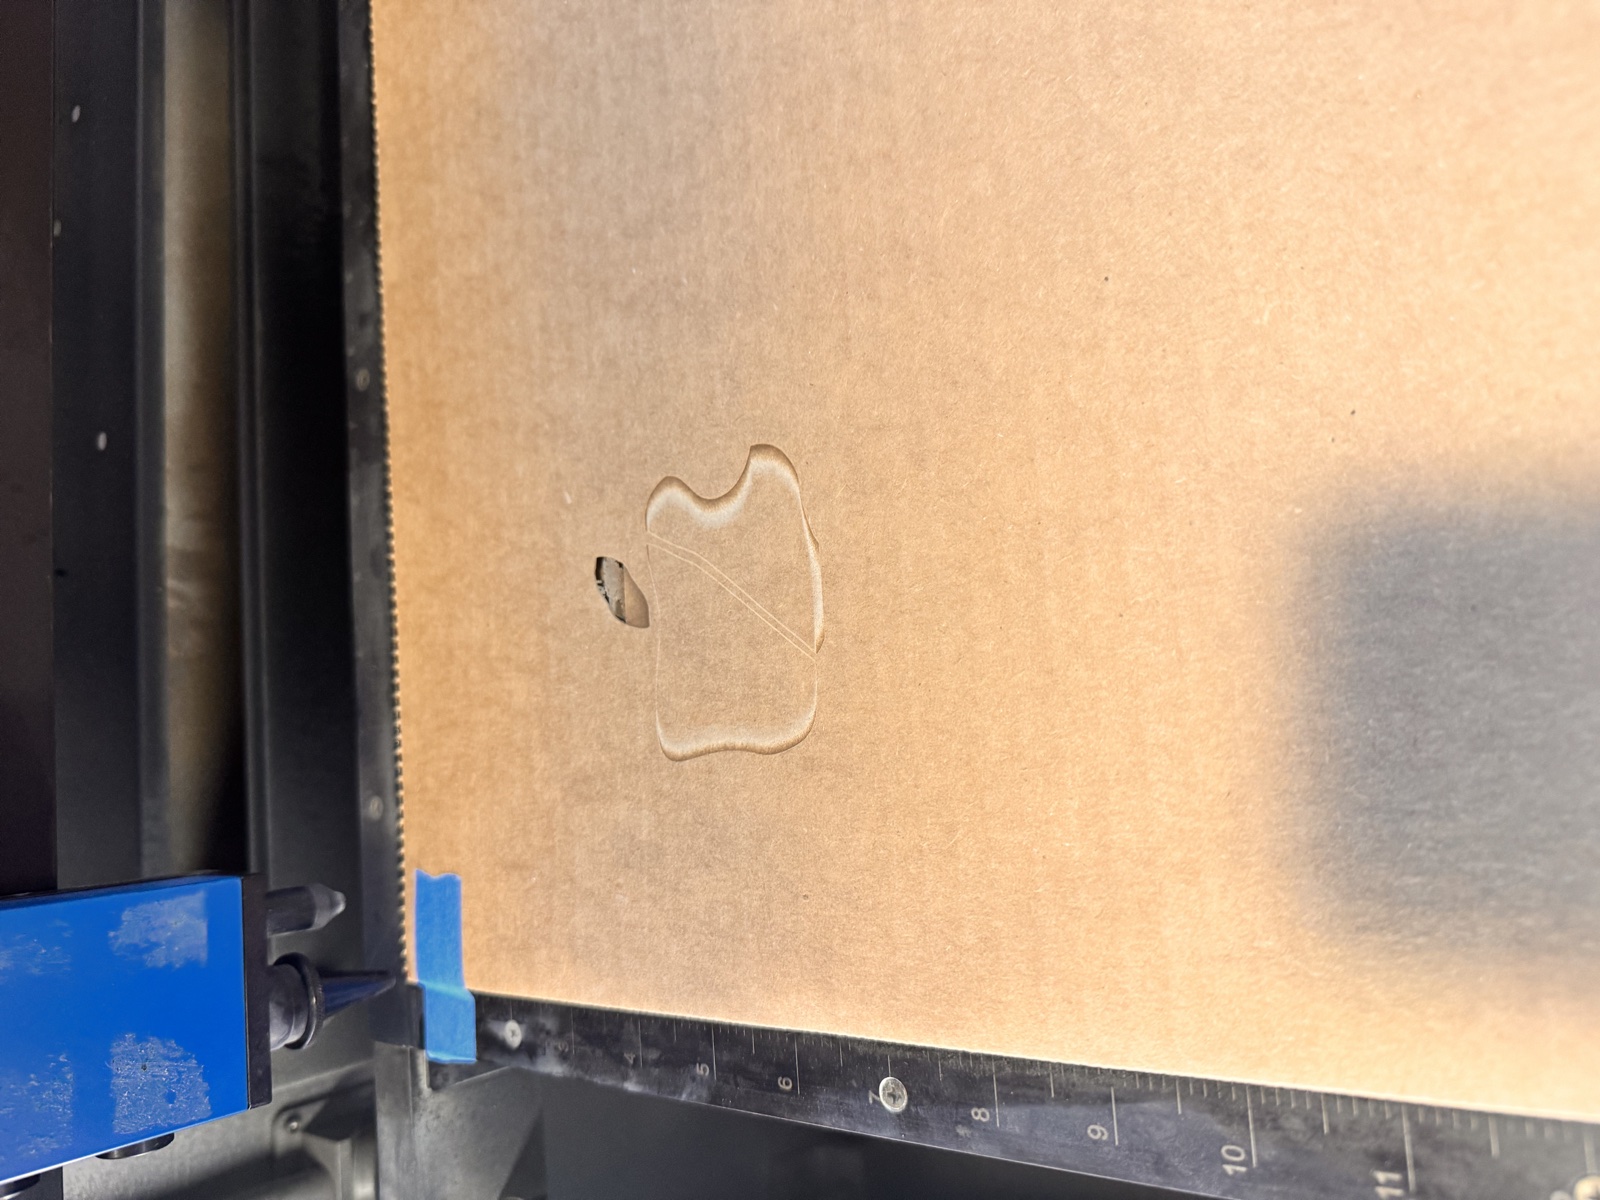
The 35 percent test was the one that told me where the ceiling was, since the halo around the wax apple was deeply burned and the leaf had nearly carbonized. The actual final piece dropped back to 25 percent and produced the clean engraving you can see on the assembled stand.
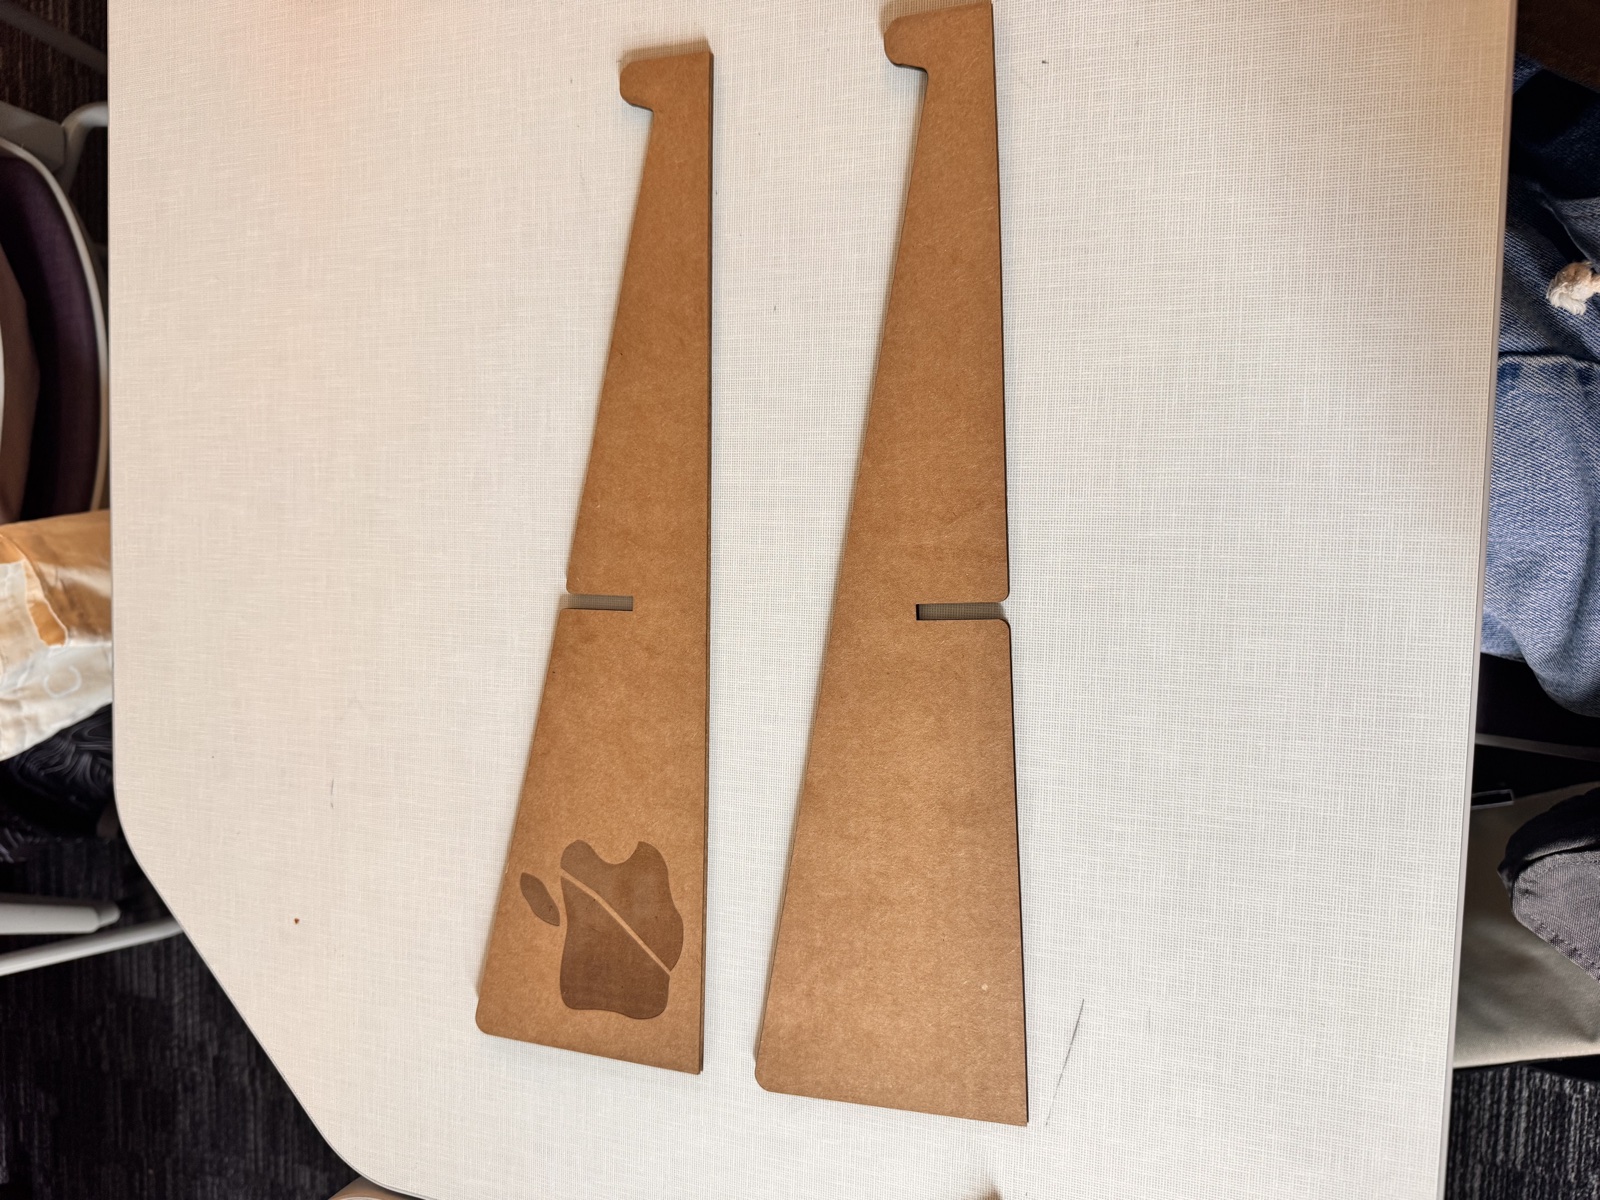
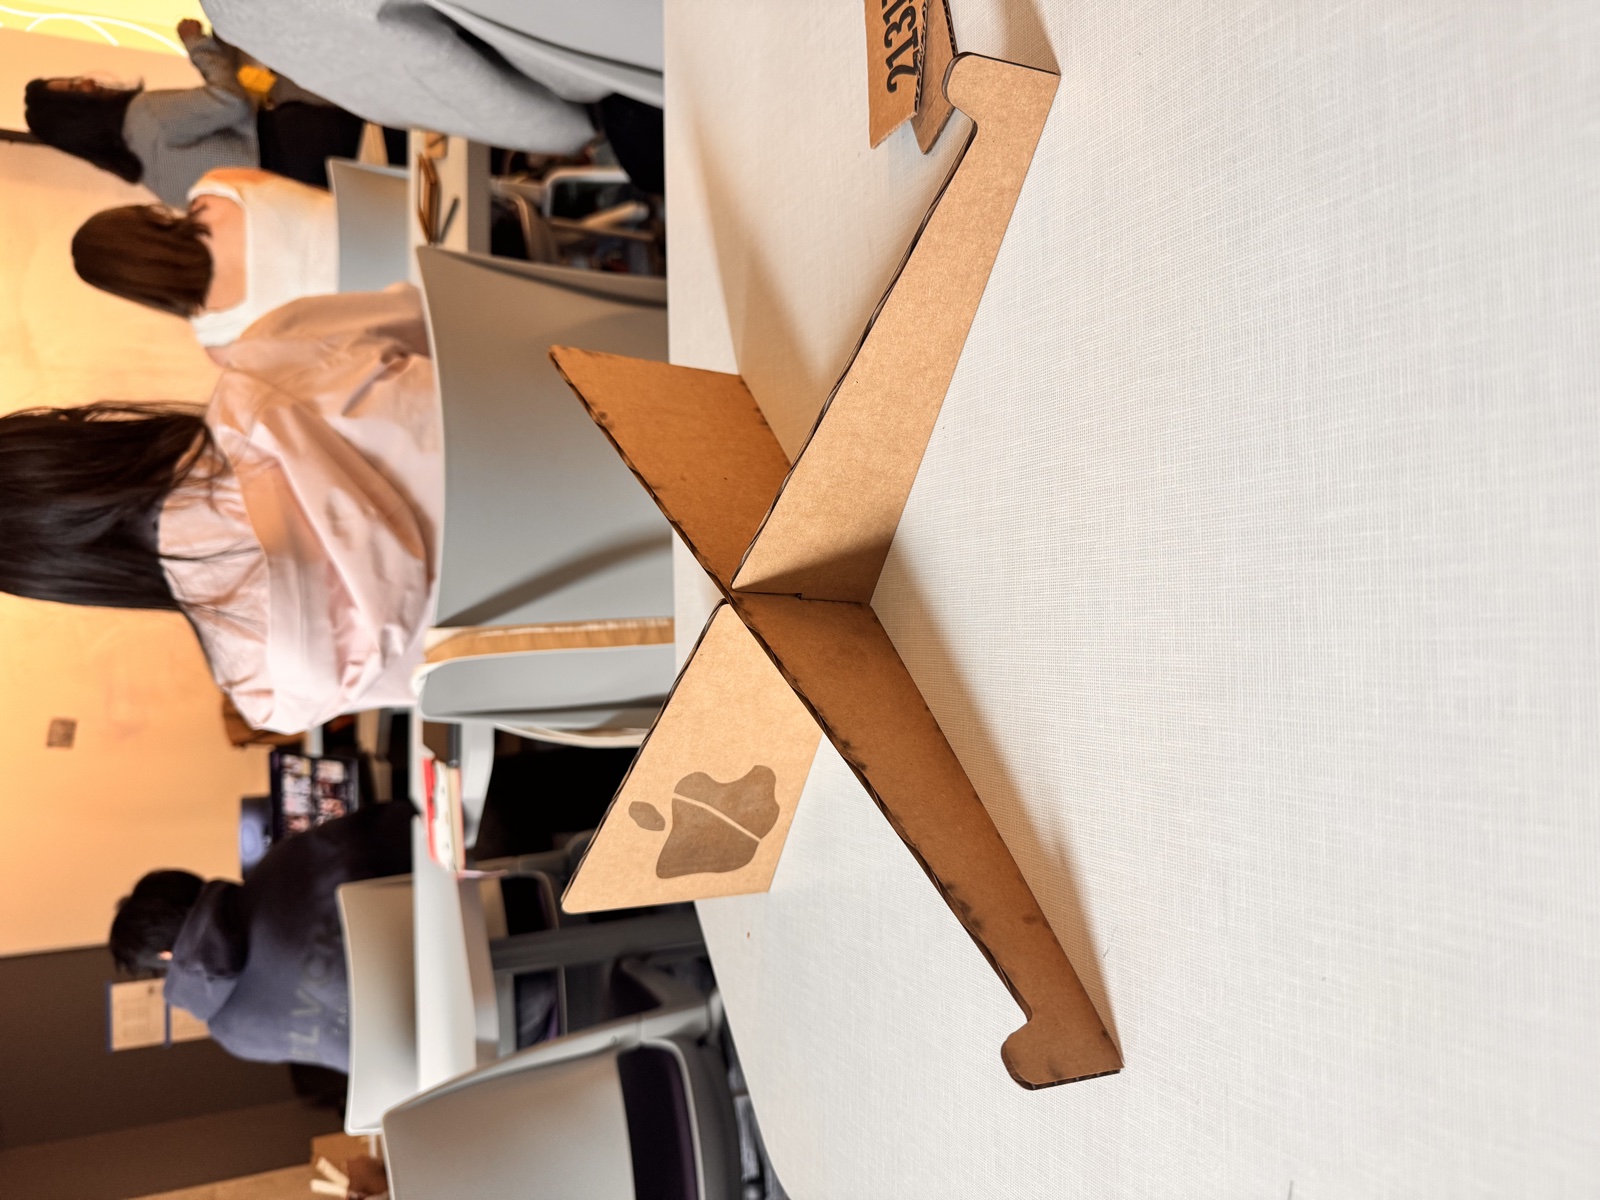
The two finished panels go together by hand in seconds, the joint is tight enough that the stand stays standing without anything sitting on it, and the engraved face faces forward when you set a laptop on top. The signature engraving sits along the inside of one panel where it is half-hidden when assembled, which I prefer to having it on the visible face.
Analysis
The thing that worked was the decision to throw out the first design. The four-part easel was a perfectly buildable object and the cut would have produced a working stand, but it was a more complicated answer than the question needed. Collapsing the stand to two interlocking pieces dropped the part count from four to two without losing any function, and the joint and the surface engravings became the parts of the design carrying the most weight. That is the version I am happiest with, even though it took a redraw to get there.
What did not work was my first instinct to push the engrave power up to where I could see the wax apple clearly from a distance. The 35 percent test made it obvious that the ceiling on flute is much lower than I had assumed, since the halo charred and the board started to smell, and the working setting ended up being the one that looked almost too faint on the test square but read correctly on the actual face. Walking the power up from 8 was slow, but it cost me one extra scrap pass instead of an entire ruined panel. The premature shutdown was harder to plan around, but taping the board back into registration and running only the unfinished path is a recovery move worth remembering, because it cost me about five minutes instead of an entire second sheet of material.
In the in-class critique the feedback was mostly positive. People called the design simple, which is the kind of compliment I wanted for an object made of two pieces, and they noticed that the slot joint has enough wiggle room to accept laptops of slightly different sizes, which had not been a deliberate decision so much as a tolerance I had drawn in for safety, but I am happy it ended up reading as adjustability rather than slop. The wax apple also got picked up as interesting, which is what I had hoped for. The one suggestion that came up was about stability, specifically that a small back support would make the structure stiffer, and I think that is right, since the X currently relies entirely on the wedge angle and the slot depth to stay upright and either dimension being off would tip the whole thing.
If I were to iterate, the next version would be cut from plywood rather than flute board, because the engraving on flute reads softly and the visible flute layer creates an uneven surface that fights the line work, and a tighter material would take the engraving more cleanly and last longer under daily use. I would add the back support that came up in critique, probably as a third piece that drops into a notch on each wedge, which would keep the part count low and address the tipping concern in one move. What I would keep is the two-piece geometry and the engraved wax apple, because those are the decisions that made the object specific to the laser and specific to me, and the rest of the design exists to hold them up.
AI used to convert hand-drawn sketches into SVG diagrams.